How to Access and Recover iPhone Photos on iCloud
Accidentally deleted or lost precious photos on iPhone? Don't panic. If you set your iPhone to automatically back up iPhone photos to iCloud, you can access and recover deleted photos from iCloud. Many Apple users know that iCloud can store iPhone, iPad or iPod photos, but most people don't know where the photos on iCloud are. Therefore, wanting to access iCloud photos seems to be a problem.Generally speaking, if you want to store photos from iOS devices on iCloud, one way is to store them in the traditional "My Photo Stream", and the other is to save them in iCloud Photo Library.
When you sign in to iCloud with your Apple ID, You can access iCloud photos on iPhone, iPad, iPod, Mac. If necessary, you can view and download them to your computer or iPhone. Now, follow the guide to access and recover iPhone photos on iCloud.Part 1. How to access my iCloud photos (from my photo stream) on my computer
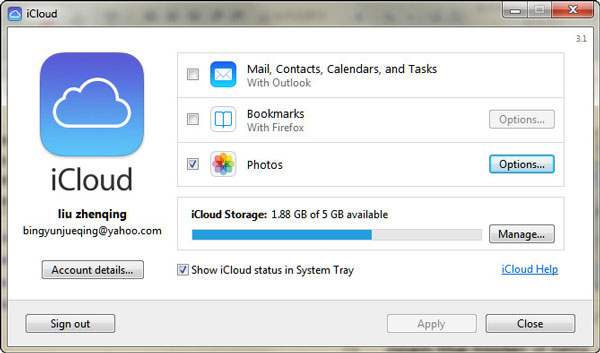
You can follow the steps to access the photos in Photo Stream.Step 1. Download iCloud for Windows to your computer.
Step 2. Log in to your iCloud account.Step 3. Check Photos > Options, and you will see the photo location information in the pop-up window. Then you can find the file where the iOS photos are saved to access iCloud photos.
Part 2. How to Transfer Photos from iCloud online to computer (from iCloud Photo Library)
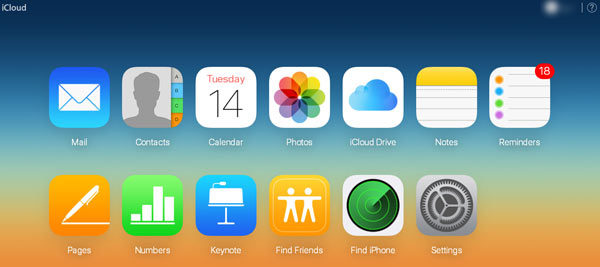
Step 1. Visit www.icloud.com on the browser of your computer, and log in your Apple ID and password.
Step 2. Find and click Photos icon to access all your photos in your iCloud.Then you can directly view iCloud photos online and select the photo which you want to download to your computer.Through the above two methods, you can view and get iCloud photos on your computer. If you want to view the photos on the device directly, you can use the following two methods.
Part 3. How to Directly Recover iPhone/iPad/iPod Photos from iCloud Backup (Erase all photos currently)
When you follow this method to directly view and access photos on iPhone, your existing data on iPhone including photos will be erased. If you don’t want to delete the original data in the iPhone, just skip this step and directly refer to the second method, which will not erase the original data in the device.Step 1. Enable my photo stream and gallery
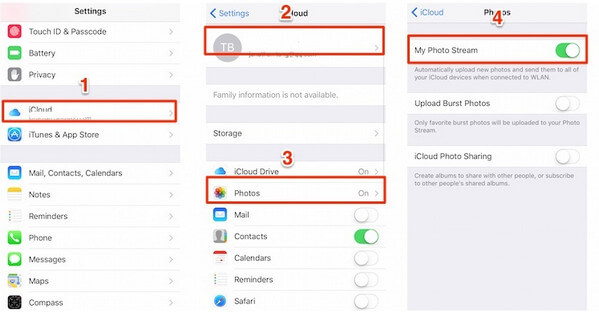
Enter "Settings" on iPhone > click your Apple ID name > iCloud > Photos > Enable My Photo Stream and iCloud Photo Library.
Step 2. Reset iPhone to factory settings
On iPhone, go to "Settings"> "General"> "Reset"> "Erase All Content and Settings".
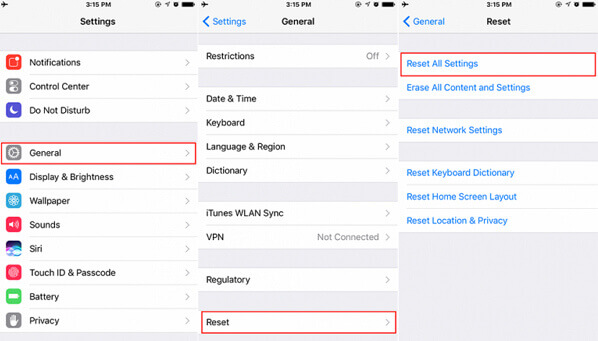
Step 3. Recover photos from iCloud backup
After resetting your iPhone, your iPhone will restart with the default settings. When setting up your iPhone, click Restore from iCloud backup.
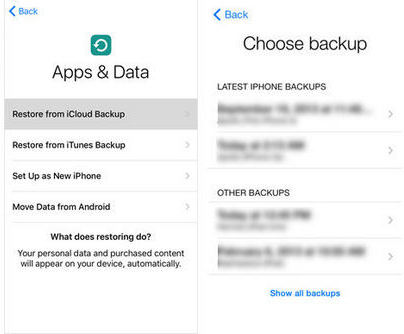
Part 4. How to View and Recover all photos on iCloud with iPhone Data Recovery
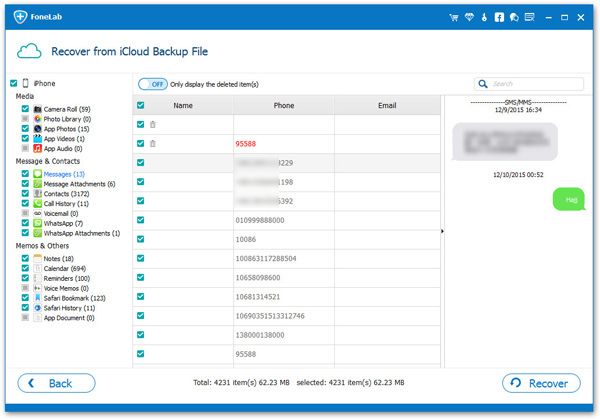
Using the previous method to restore photos in the iCloud backup requires erasing all existing data on the iPhone, which is a shame. There is another safer and more effective way to avoid inconvenience and restore iCloud photos, that is, with the help of iPhone Data Recovery. It is a professional data recovery software that allows you to access photos in iCloud, no matter where the photos are stored, photo stream or iCloud photo library. More importantly, you do not need to erase all the content and settings on the iPhone when you restore iCloud data, which can protect the safety of your iPhone data.
The Features of iPhone Data Recovery Software:
1. Recover deleted data on iPhone/iPad/iPod directly, including third-party tool like wechat, viber, line, QQ data and attachments.2. Recover data from iTunes and iCloud backup selectively.
3. Repair iOS system problem like recovery mode stuck, apple logo stuck and other issue.4. Back up any iPhone/iPad/iPod data and restore data on iOS device/PC.
Step 1. Log in to your iCloud account
After downloading and installing the trial version of iPhone Data Recovery for free, select the recovery mode from iCloud backup files and fill in your Apple ID and password.
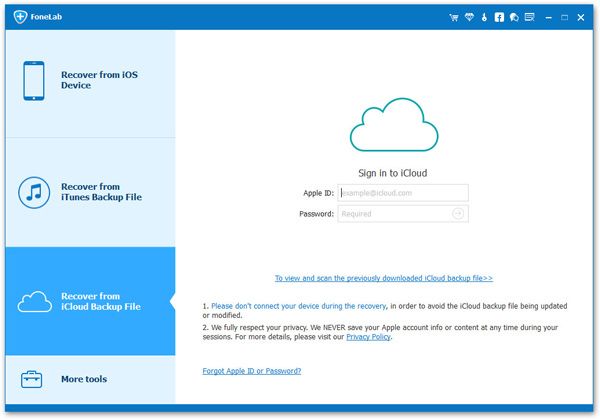
Step 2. Download iCloud backup on computer
After logging in to the iCloud account, iPhone Data Recovery will list all the backup files fr you. Scan and select the files you want from the iCLoud backup, and then click the "download" button to continue.
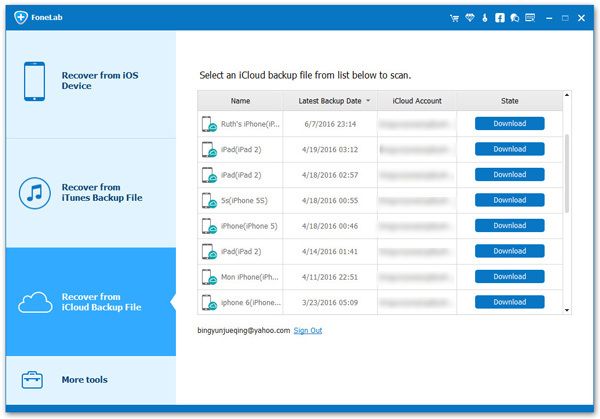
Step 3. Access photos on iCloud
In the left column of the interface, click the items of App Photos, the Photos Library and Photo Stream. Begin to scan the iCloud backup photos and check the data which you want to get back. Then click the "Recover" button in the right corner to export iCloud photos to computer.
