How to Export iPhone Data to Computer with iPhone Recovery
This article focuses on how to effectively export iPhone data to computer with iPhone Data Recovery application, including existing data and deleted data in the phone. iPhone Data Recovery is full compatible with any version of Windows and Mac, including the latest version. With the highly intuitive interface and simple steps, you don’t need to be a techie to export your iPhone data.
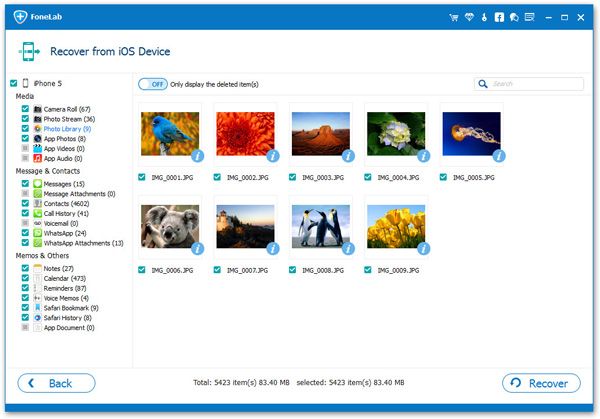
iPhone Data Recovery supports three effective ways for you to transfer and recover most of data in various scenarios, which is capable of recovering different kinds of data files, including photos, videos, contacts, app data, notes, text messages, and more. You can directly export iPhone data from your phone, iTunes backup and iCloud backup instead of overwriting and erasing any existing data in your device.Key Features About iPhone Data Recovery Software.
- Restore deleted data from backup files or from iPhone directly.- Extract encrypted iTunes Backup and view unreadable data.
- Back up iPhone data to computer for free.- Fix iOS system and get it back to normal.
- Preview data before recovery and selectively restore you need.You can selectively preview and export iPhone data on the computer by follow the steps as below.


How to Export iPhone Data to Computer with iPhone Recovery Tool
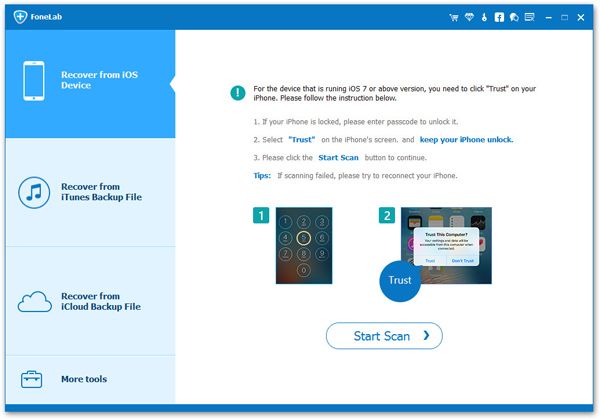
Step 1. Download the iPhone data recovery software on computer and install it, run the tool after you finish the setup process, choose "iPhone Data Recovery" option on home screen. Link your iPhone to the software and press "Trust" on iPhone screen, the iPhone will trust this pc and the software will detect iPhone immediately, it will show information about iPhone, then you can tap "Start Scan" button to scan iPhone internal memory.
Except this methods, the iPhone data recovery software also provide another feature for you to export data to computer for backup, follow the below steps.
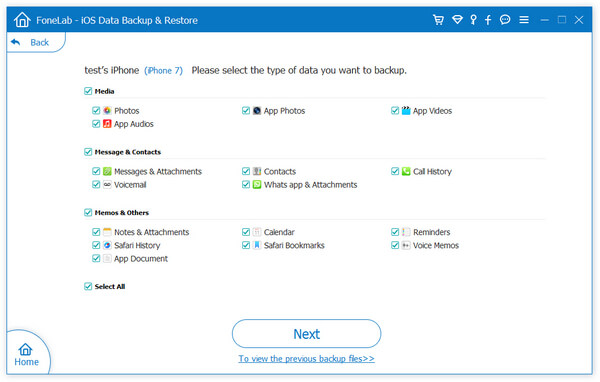
Step 1. Run the iPhone data recovery software and select "iPhone Data Recovery" > "iOS Data Backup & Restore" mode on the screen, then switch to "iOS Data Backup" option.