How to Back Up iPad Photos
In today's digital age, our personal devices such as iPads contain a vast collection of precious memories in the form of photos and images. From family vacations to special moments with loved ones, these pictures hold immense sentimental value. However, the risk of data loss due to accidental deletion, device damage, or software malfunctions is an ever-present concern. Therefore, it is crucial to regularly back up iPad photos to ensure the preservation of these cherished memories. This article aims to provide a comprehensive guide on the significance of backing up iPad photos and the methods to do so effectively.Method 1. Backup iPad Photos via iCloud Backup
iCloud Backup is a feature provided by Apple that allows users to securely store their iOS device's data and settings in the cloud. This includes photos, videos, app data, device settings, and more. iCloud Backup ensures that your important data is safely stored and can be easily restored if needed.Advantages of iCloud Backup:
- Automatic and Convenient: iCloud Backup automatically backs up your iOS device on a daily basis when it is connected to Wi-Fi, so you don't have to worry about manually backing up your data.
- Secure and Encrypted: Your data is securely encrypted and stored in the cloud, providing protection against data loss and unauthorized access.
- Easy Restoration: If you ever need to replace your device or restore your data, iCloud Backup makes the process quick and seamless.
How to Set Up and Use iCloud Backup for Photos
To set up iCloud Backup for photos on your iOS device, follow these steps:1. Open the Settings app on your iOS device.
2. Tap on your Apple ID at the top of the screen.
3. Tap on iCloud, then select iCloud Backup.
4. Turn on the iCloud Backup toggle. Your device will start backing up automatically when connected to Wi-Fi and plugged in to power.
To use iCloud Backup for photos:
1. Open the Photos app on your iOS device.
2. Select the photos you want to back up.
3. Tap on the Share button and then select Add to iCloud Photos.
By following these steps, your selected photos will be backed up to iCloud and can be accessed from any of your Apple devices linked to the same iCloud account.
Method 2. Backup iPad Photos via iTunes Backup
iTunes backup is a useful way to create a complete and secure backup of your iPad, including photos, apps, settings, and other data. It is particularly useful when you want to restore your device to a previous state in case of data loss, device replacement, or software update issues.How to Backup Photos from iPad using iTunes
To backup photos from your iPad using iTunes, follow these steps:- Connect your iPad to your computer and open iTunes.
- Select your iPad when it appears in iTunes.
- Click on the Summary tab in the left sidebar.
- Under the Backups section, select This computer.
- Click on Back Up Now to start the backup process. This will create a complete backup of your iPad, including all photos and other data.
Note: iTunes backups include all photos stored on your iPad, but you can also use iCloud Photo Library to automatically backup and sync your photos across devices.
Method 3. Use Other Cloud Services to Back Up Photos
1. Google Photos: Google Photos offers free unlimited storage for high-quality photos and videos. It can automatically back up your iPad photos and provide powerful search and organization features.2. Dropbox: Dropbox allows you to back up photos and other files from your iPad to the cloud. It provides easy file sharing and collaboration features.
3. OneDrive: OneDrive, developed by Microsoft, offers free cloud storage and allows you to back up photos, videos, and documents from your iPad. It also integrates well with Microsoft Office apps.
How to Use These Cloud Backup Services to Back Up iPad Photos
1. Using Google Photos to Back Up iPad Photos
a. Download and install the Google Photos app from the App Store on your iPad.b. Open the app and sign in with your Google account. If you don't have one, you can create a new one for free.
c. Follow the on-screen instructions to enable photo backup. You can choose whether to back up photos in high quality (unlimited free storage) or original quality (limited free storage).
d. Once the backup is enabled, Google Photos will automatically back up your iPad photos whenever you're connected to Wi-Fi.
2. Using Dropbox to Back Up iPad Photos
a. Download and install the Dropbox app from the App Store on your iPad.b. Sign in to your Dropbox account or create a new one if you don't have an account yet.
c. Once signed in, tap the Upload button within the Dropbox app and select the photos you want to back up from your iPad's camera roll or albums.
d. You can also enable the camera uploads feature within the Dropbox app to automatically back up photos from your iPad's camera roll to your Dropbox account.
3. Using OneDrive to Back Up iPad Photos
a. Download and install the OneDrive app from the App Store on your iPad.b. Sign in with your Microsoft account or create a new one if needed.
c. Tap the Add button within the OneDrive app and select the photos you want to back up from your iPad.
d. You can also enable camera upload settings within the OneDrive app to automatically back up photos and videos from your iPad's camera roll to your OneDrive account.
By following these steps, you can easily use Google Photos, Dropbox, or OneDrive to back up your iPad photos to the cloud for safekeeping and easy access from any device.
Method 4. Using Apple Photos App on Mac
If you are using a Mac computer and want to import photos from your iPad, the Photos app provides a convenient and straightforward way to accomplish this. By following the steps below, you can seamlessly transfer your iPad photos to your Mac for safekeeping and easy access.Here are the detailed step-by-step instructions on how to import photos from your iPad to your Mac using the Photos app:
1. Connect your iPad to your Mac using a USB cable.
2. Open the Photos app on your Mac.
3. In the sidebar of the Photos app, you should see your iPad listed.
4. Click on your iPad's name in the sidebar to view the photos on your iPad.
5. Select the photos you want to import to your Mac.
6. Click the Import Selected button to initiate the transfer of the selected photos.
7. Once the import process is complete, your iPad photos will be stored in the Photos app on your Mac for easy organization and access.
Method 5. Using Third-Party Tool to Back Up iPad Photos
1. Using iOS Recovery Tool to Back Up iPad Photos
iOS Data Recovery tool is a comprehensive data recovery and backup software designed for iOS devices. It supports a wide range of iOS devices, including iPhone, iPad, and iPod touch. In addition to data recovery, it also offers data backup and transfer features, making it a versatile tool for managing iOS device data.Key Functions About iOS Recovery Tool:
1. Data Recovery: It can recover and retrieve various types of data from iOS devices, such as contacts, messages, call history, notes, and more.
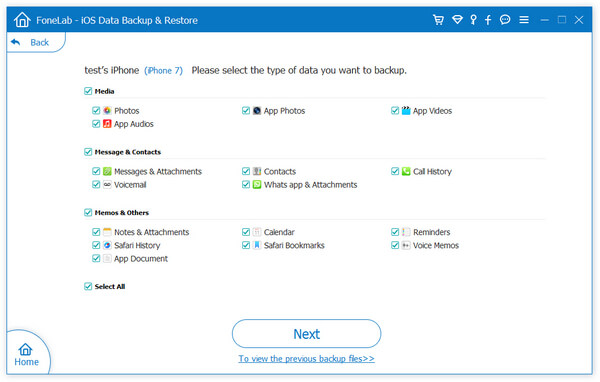
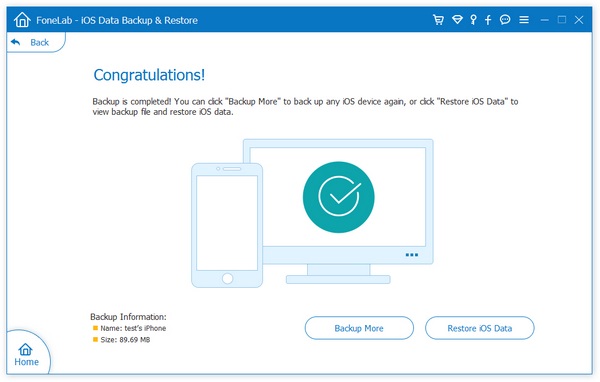
2. Data Backup: The software allows users to back up their iOS device data to their computer or another iOS device. This includes backing up photos, videos, music, contacts, messages, and more.
3. Data Transfer: It enables users to transfer data between iOS devices and computers, making it easier to manage and organize their data.
To backup photos from your iPad using iOS data recovery tool, follow these steps:
Step 1. Download and install iOS data recovery on your computer.
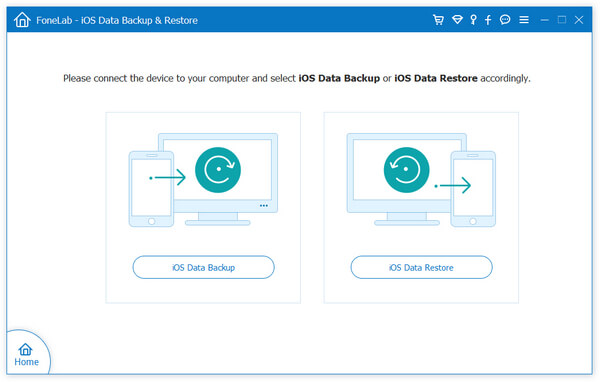
Step 2. Launch the software and connect your iPad to the computer using a USB cable. Select the “iOS Data Backup & Restore” option from the main interface.


2. Using iOS Transfer Tool to Back Up iPad Photos
iOS Transfer app is a powerful and user-friendly iOS data transfer and backup tool that allows users to seamlessly manage and protect their data on iPhone, iPad, and iPod devices. With its intuitive interface and robust features, iOS transfer provides a convenient way to back up photos, videos, music, contacts, messages, and more, making it an essential tool for iOS device users.Key Functions of iOS transfer:
1. Data Transfer: Easily transfer various types of data between iOS devices and computers, including photos, music, videos, contacts, and more.
2. Data Backup: Backup and restore iOS device data, including photos, to keep important information safe and secure.
3. File Management: Organize and manage files on iOS devices, allowing users to create, delete, and edit various types of data directly from the computer.
4. Multimedia Management: Import, export, and manage multimedia files, such as music, videos, and photos, with ease and efficiency.
5. Contact and Message Backup: Back up and restore contacts, messages, and other important data to prevent loss and ensure data integrity.
To back up photos from your iPad using iOS transfer, follow these specific steps:
Step 1: Download and Install iOS transfer and link iPad
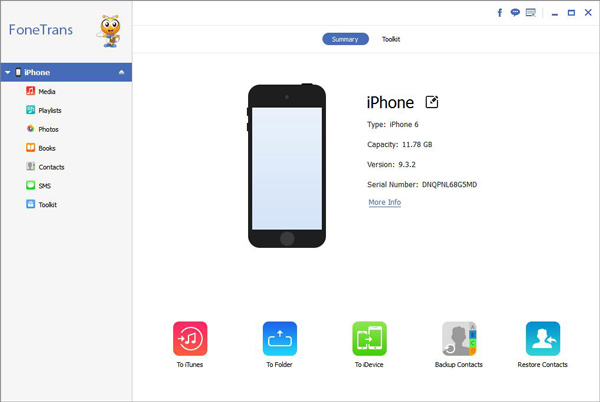
Download and install iOS transfer tool on your computer. Launch the software on your computer and use a USB cable to connect your iPad to the computer.

Once your iPad is connected, open the Photos tab within iOS transfer to view all the photos on your iPad. Select the photos you want to back up, or choose Select All to back up all photos. Click on the Export to option and choose a destination folder on your computer to save the backed-up photos. The software will then start the backup process, and once completed, a confirmation message will be displayed.

How to Enable Automatic Backup Settings
Automatic backup settings are extremely important and convenient for ensuring that your important data, such as photos, documents, and settings, are regularly and securely backed up. In the event of device loss, damage, or malfunction, automatic backups help to minimize the risk of data loss and make the recovery process much smoother and less stressful. By setting up automatic backups, you can have peace of mind knowing that your valuable data is safely stored and easily retrievable when needed.How to Configure Automatic Backup Options for Photos on iPad
To configure automatic backup options for photos on your iPad, follow these steps:
1. Open the Settings app on your iPad.
2. Scroll down and tap on Photos.
3. Select iCloud Photos (or iCloud Photo Library on older iOS versions) to enable automatic backup of your photos to iCloud.
4. If you want to optimize storage on your iPad, you can also enable Optimize iPad Storage under the iCloud Photos settings. This feature will keep smaller versions of your photos on your iPad to save storage space while ensuring that the full-resolution photos are backed up to iCloud.
5. If you prefer to use a different cloud storage service for automatic photo backup, you can download the app for that service (e.g., Google Photos, Dropbox) and configure its automatic backup options within the app.
By following these steps, you can ensure that your photos are automatically backed up to iCloud or another preferred cloud storage service, providing an added layer of protection for your valuable memories.
Backup Precautions
1. Regular Backup Frequency: Ensure to maintain a regular schedule for backing up your iPad photos, especially after important events or trips.2. Storage Space Monitoring: Keep track of the available storage space on your backup destination to ensure it can accommodate all your photos.
3. Network Connection: Check for a stable and strong Wi-Fi connection before initiating the backup process.
4. Battery Level: Ensure your iPad has sufficient battery power or is connected to a power source to avoid interruptions during the backup.
5. Data Integrity Verification: After completing a backup, verify the integrity of the backed-up data to ensure it is complete and uncorrupted.
6. Multiple Backup Locations: Consider using multiple backup locations, such as cloud storage, computer backups, external hard drives, or USB drives, for added security against data loss.
In conclusion, regularly backing up iPad photos is very important for preserving memories and protecting against data loss. Methods like using iCloud, iTunes, or third-party software should be carefully chosen to ensure comprehensive coverage and easy access. With the growing dependence on digital photos and the risks of device issues or data breaches, regular iPad photo backups are crucial. It's important for individuals to prioritize this practice to protect their photo libraries and minimize potential heartaches from losing irreplaceable photos.


