How to Transfer Music from iPhone to Computer
Want to transfer your iPhone music to computer as a backup or some other reasons? Besides using iTunes, another perfect choice is iPhone Data Manager. It's a powerful and professional transfer tool that can help you transfer your data between iPhone and computer easy and efficient. You can achieve your goal with only two steps.
How to Transfer Music from iPhone to Computer
Step 1. Connect your iPhone to computer
After downloading and installing the iPhone Data Manager program on your computer, launch it connect your iPhone to the computer with a USB cable. Your iPhone will detected by this iPhone to computer transfer automatically.
Note: You need to install iTunes on your computer, but please don’t run it during the transfer.
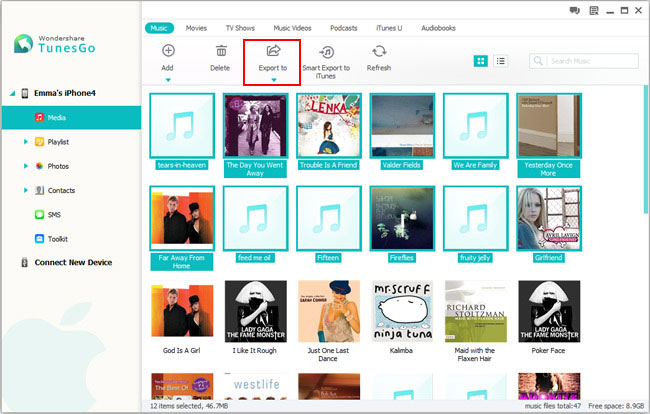
You will see your iPhone displayed as the following window. iPhone Data Manager fully supports iPhone 5s, iPhone 5, iPhone 5c, iPhone 4S, iPhone 4 and iPhone 3GS.

Step 2. Transfer music from iPhone to computer
To transfer your songs, your need to click "Export Music to Folder" in the primary window. After that, your iPhone music will be transferred to your computer instantly.

You can copy songs from iPhone to computer in this way. Please click "Media" in the left column to bring up the media window, then you can see a top line in the media window.
Click "Music" to the music window, then you need to mark those songs you want to transfer and then click the little triangle under "Export to". A drop-down list appears. Choose "Export to My Computer" and choose a location to save those music on the computer.

The professional transfer tool offers you to transfer your data between iPhone and computer, including music, photos, contacts, SMS, etc. If you have a need, you can transfer your data from computer to your iPhone with ease.


